


Estimated reading time: 6 minutes
Contouring doesn’t have to be complicated. With the right products and a few easy steps, you can sculpt your face, define your features, and achieve a natural look. This beginner’s guide shows you how to contour step by step, using affordable products you can shop right here at Bella Scoop.
Why Contouring Works
Contouring is about using light and shadow to enhance your natural features. A little depth under the cheekbones, brightness under the eyes, and a soft glow on high points of the face can instantly lift and define your look.
Step 1: Pick the Right Products
Bronzer for Contour
Start with a matte bronzer for definition. Rimmel Natural Bronzer – Sun Bronze 022 is beginner-friendly and easy to build. For a versatile powder finish that can double as contour or setting, try L’Oréal Paris True Match Cream Powder. Choose a shade one to two tones deeper than your foundation for natural definition.
Concealer for Brightening
Choose a concealer one to two shades lighter than your foundation to highlight under the eyes, forehead, and chin.
-
L’Oréal Paris True Match Radiant Serum Concealer – lightweight and luminous, great for a natural brightening effect.
-
Maybelline Instant Age Rewind Eraser Concealer – cult favourite with a sponge tip for easy application.
-
Maybelline Fit Me Concealer – beginner-friendly, blendable, and affordable everyday option.
Pro Tip: Pick a shade lighter than your foundation for brightening, and stick to your exact shade when concealing blemishes.
Highlighter for Glow
Once you’ve sculpted and brightened, bring back light with a radiant highlight.
- Rimmel Glow Stick Highlighter – a quick and easy stick format, available in multiple shades to suit different skin tones.
-
Ofra Brentwood Highlighter – a silky powder with Ofra’s signature glow, perfect for that lit-from-within finish.
-
Ofra Palettes (On The Glow, Midi, and Mini Mix) – all-in-one options that combine highlighter, bronzer, and blush in a single palette, ideal for beginners who want everything in one place
Pro Tip: Powder formulas like Ofra’s give long-lasting luminosity, while sticks are perfect for on-the-go touch ups.
Tools for Application
The right tools ensure a flawless finish:
-
Glam By Manicare x Bec + Bridge Contour Brush for cheekbone definition
-
Artiste Manicare Professional Contour Brush 55 for blending powders
-
Manicare Perfect & Correct Sponge Kit for blending creams seamlessly
Step 2: Map Out Where to Contour
-
Cheekbones: Apply bronzer just under the cheekbone, from ear to mid-cheek.
-
Jawline: Sweep along the jawline for sharper definition.
-
Nose: Lightly trace each side of the nose for a slimmer look.
-
Forehead: Blend along the hairline to balance proportions.
Pro Tip: Always start light and build up. It’s easier to add more product than to tone it down.
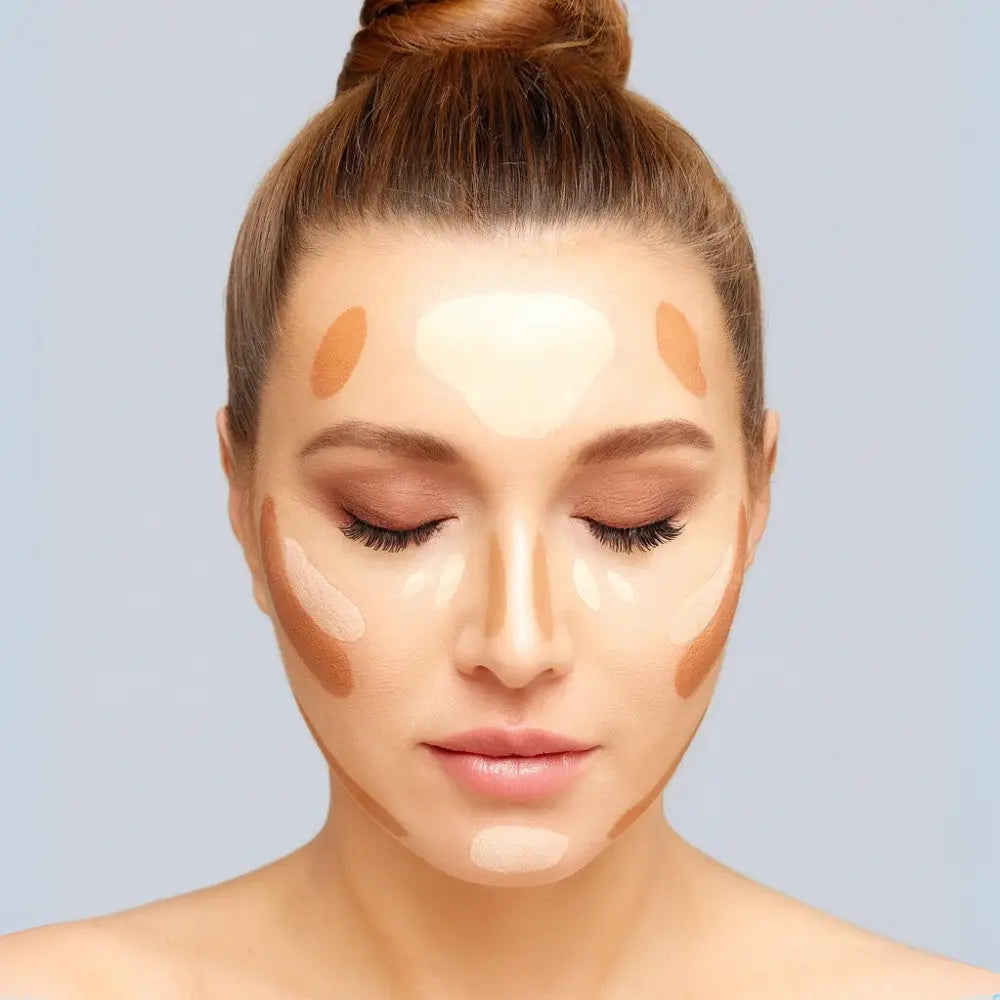
Apply contour and highlight in these key areas. Darker shades create shadow, lighter shades bring forward features.
Step 3: Blend Like a Pro
Blending is the secret to contouring that looks natural. Use the Manicare Perfect & Correct Sponge Kit damp for cream products, or a fluffy brush for powders. Always blend upwards for a lifted effect.
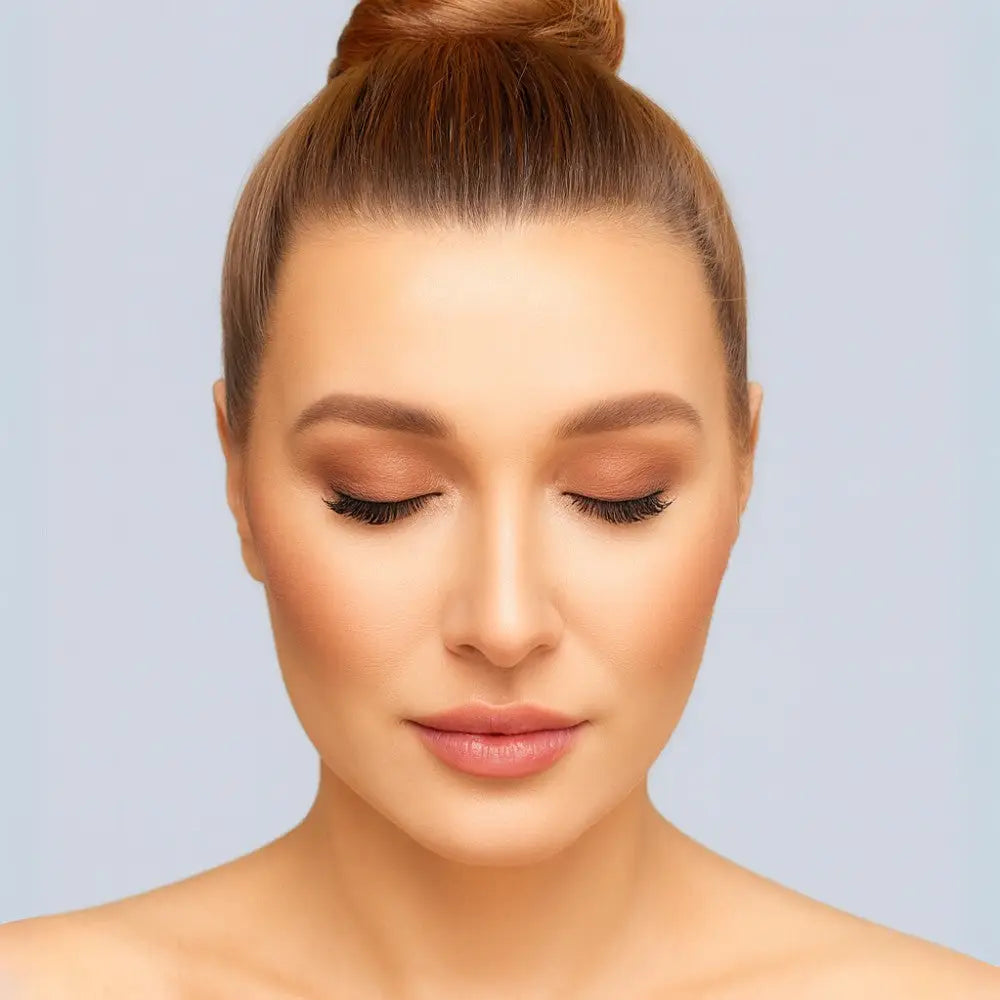
After blending, contour should look seamless and natural - sculpted, not streaky.
Step 4: Highlight to Balance
Apply concealer in the centre of the face and under the eyes to brighten. Add highlighter to the tops of the cheekbones, the bridge of the nose, and cupid’s bow for a fresh glow.
Insider Secret: Layering a liquid highlighter under powder gives a “lit from within” look that lasts.
Step 5: Lock It In
Keep your contour in place with a setting spray like Maybelline Superstay Double Fixer Setting Spray. It ensures your makeup stays put even on hot Aussie days.
Common Mistakes Beginners Make
-
Choosing a contour shade that’s far too dark
-
Forgetting to blend properly
-
Skipping highlight, which leaves the face looking flat
Final Thoughts
Contouring doesn’t mean changing your face — it’s about enhancing your best features. With beginner-friendly products like Rimmel Natural Bronzer, L’Oréal True Match Cream Powder, and easy-to-use tools from Manicare, you can sculpt and define in just a few minutes.
✨ Ready to start sculpting? Shop our full range of contouring products.